Particle Emitter
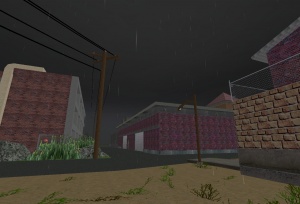
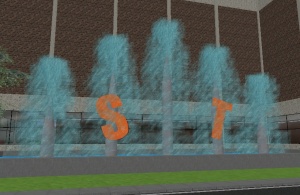
A Particle Emitter is a special object type that can spawn groups of other objects, called particles. Particles have no collision and are simply visual effects that are added to the scene. They can be used to create countless special effects, including: rain, snow, blowing leaves, fireflies, fire, smoke, ground fog, waterfalls, fireworks, etc. Starting with build 1174, particle emitters can be rotated like standard objects, independent of the particle emitting on its local axes.
The Active Worlds particle creation environment is especially powerful, and can be used to create limitless types of effects.
Particle Emitter Options
Particle Type
This controls what kind of particle will be released. There are four types:
- Sprite - This is the most simple form of particle. The particle looks the same regardless of where it is viewed. The texture is simply drawn to the screen, ignoring the angle the particle is facing. This is similar to the way in which coronas are drawn.
- Facer - The particle is a flat vertical panel that turns to face the user. This is the same way in which facer objects are handled.
- Flat panel - The particle is a flat panel that can be rotated into any position.
- Model - The particle is an RWX or COB model.
Asset List
This defines what textures, videos or models will be used to make the particles. This may be a list of textures (separated by commas) or a valid media url for sprites, facers, and flat panels, or a list of model names (separated by commas) for model type particles. If more than one texture, video or model is listed, the each particle will use one from the list at random.
For texture lists, masks can also be specified except for media. You can place the name of the mask after a colon as follows:
mytexture:mymask
If you omit the mask, the texture will "self mask" by making the pixel opacity based on pixel brightness. (White pixels are opaque, black are transparent) If you do not want any mask, use a colon but supply no mask name. So, if you had three textures you wanted to use, the first of which was not masked and the second of which was self-masking, you would use the following:
texture1:,texture2,texture3,mask3
Videos can be used as particles by entering a full media url that is compatible with the media command. However, this can be a severe performance hit as the video will be rendered on every individual particle. In the asset list, a full URL must be provided with the http:// included.
Tag Name
This assigns a name to the emitter. If this field is NOT empty, the emitter will NOT start when it comes into view, but will need to be triggered by another object.
Emitter Lifespan
This defines how long (in milliseconds) the emitter will release particles. When this time expires, the emitter will no longer release new particles, although existing particles will continue to run their course. If you want the emitter to release particles forever, enter zero.
Release Count
This defines how many particles will be released at one time.
Release Time
This defines how often (in milliseconds) new particles will appear. If this range is set to 500 to 3000, then particles will be released at least once every three seconds, but not more often than once every half second. The browser will emit particles at random intervals between these two values.
Particle Lifespan
This defines how long (in milliseconds) each particle will last once it is released. For example, if this is set to 2000 then each particle will last 2 seconds.
Fade In Time
This only affects texture-based particles (sprites, facers, and flat panels) and has no effect on "model" type particles. This defines how long (in milliseconds) it will take for each particle to "fade in" to view. See "Opacity" below for more information.
Fade Out Time
This only affects texture-based particles (sprites, facers, and flat panels) and has no effect on "model" type particles. This defines how long (in milliseconds) it will take for each particle to "fade out" of view. See "Opacity" below for more information.
Interpolate
If this option is checked, particles will begin at the minimum size and start color. Each particle will then transition to the ending size and color by the end of its lifespan. If this option is NOT checked, than each particle will have a random size between min and max size, and a random color between the given start and end colors.
Gravity
If this option is checked, particles "fall" according to gravity.
Zone Collision
If this is checked, particles will check to see if they have run into zone boundary. If so, the particle will vanish instantly, without fading out. This is useful for keeping particles out of unwanted areas. For example, you wouldn't want rain or snow particles to come indoors. This will not keep particles from appearing in other zones, but it will keep particles from moving into a different zone once they exist.
Note that this check consumes more CPU time, and may cause slowdowns, so you shouldn't enable this option unless you need it. Also, particles can only collide with zones that have the "particle collision" option enabled. That is, for a particle to run into a zone both the particle emitter and the zone must have collision enabled.
Zone Exclusive
This will prevent particles from spawning in a zone different from the emitter.
Use camera position
Normally particles appear within a box as defined by the emitters volume (see below). However, you may enable this option to move the spawning area from the emitter to the camera. The effect will be that particles will seem to come from all around the user, wherever they go. This is ideal for creating weather effects.
Color Start
If "Interpolate" is checked, then particles will begin at this color and fade to "Color End". If it is not checked, then particles will randomly choose a color between "Color Start" and "Color End".
Color End
If "Interpolate" is checked, then particles will begin at this "Color Start" and fade to this color. If it is not checked, then particles will randomly choose a color between "Color Start" and "Color End".
Size
This defines how big (in meters) each particle is. The first number is the minimum size, and the last number is the maximum size. These numbers have different effects based on what type of particle this is:
- For Sprites, Facers, and Flat Panels, the first two numbers define the width and height of the 2d panel, and the last number (Size Z) is not used. So, if Size X was set to 2 / 3 and Size Y was set to 10 / 10, then the emitter would create particles 10 meters long, with a width between 2 and 3 meters.
- For models, these numbers act as scaling values. Making all of the numbers 1 would cause objects to appear normal size, while making all values 10 would cause the objects to appear 10 times their normal size.
Volume
This defines the size (in meters) of the cubic area in which new particles will appear. For example:
- If all members are set to zero, then all particles will appear right at the emitter.
- If the X range is -5.00 to 5.00, and the other members are zero, then each particle will appear randomly along a line that extends five meters east and west from the emitter origin.
- If all ranges are 0.00 to 1.00, then each particle will appear randomly within a one cubic meter area that extends up, North, and East from the origin.
Note that if you have a single particle emitter selected, it will show the cubic area as a purple wireframe, so you can see the area in which particles will appear.
Acceleration
This defines how fast (in meters per second) particles will accelerate. When a particle is created, it will randomly choose an acceleration value from within the given range, and will accelerate at that rate for the duration of its lifespan.
Speed
This defines how fast (in meters per second) particles will be moving at the time of their creation. When a particle is created, it will randomly choose a speed value from within the given range.
Start Angle
This defines the position (in degrees of rotation) of each particle. This has no effect on sprites and facers.
Spin
This defines the rotation (in degrees of rotation per second) of each particle. This has no effect on sprites and facers.

Render Style
This defines how the particle will be blended with the scene. This option has no effect on "model" type particles.
- Normal - The texture is simply drawn to the scene with no special effects.
- Bright - The texture is drawn to the scene, blending with whatever is already visible so as to brighten the scene.
- Glow - The texture is added to the scene, making it significantly brighter. The difference between "bright" and "glow" can be subtle in certain situations. It is best to simply experiment with this option to achieve the desired effect.
Opacity
This is a value between 0.00 and 1.00 that defines how opaque the particles will be. This option has no effect on "model" type particles. Particles begin at zero opacity (fully transparent) and fade to this value over the course of the "Fade In Time". They then fade back to fully transparent during the last segment of their lifespan according to "Fade Out Time".
For example, if "Opacity" is set to 0.5 (half opacity), "Fade In Time" and "Fade Out Time" as both set to 1000, and "Particle Lifespan" is set to 5000, then the particle would fade in over once second, hold at 50% opacity for three seconds, then fade back out over the final second.
Min/Max Values
Max Release Count: 32
- Up to 32 particles can be emitted within a single frame.
Min Release Interval: 25ms
- The smallest release interval is 25 milliseconds.
- About 40 times a second up to 32 new particles can be created each time.
Max Particles: 100
- The simultanious count of particles for every emitter is 100 at a time.


